![]()
IoT Unlocked: Your Journey to Innovation Starts Now
![]()
IoT Unlocked: Your Journey to Innovation Starts Now

In this step-by-step guide, I’ll walk you through the process of setting up a web server on a Raspberry Pi Pico W using Phew, making this seemingly daunting task straightforward and achievable.
Creating your own web server might seem like a complex task, However, with the advent of accessible hardware like the Raspberry Pi Pico W and user-friendly library such as Phew, building a web server is now within the reach of hobbyists and enthusiasts alike.
Phew! is designed as a streamlined web server, focusing on efficiency and ease of use. It brings to the table a host of features optimized for rapid deployment and minimal memory footprint, making it an excellent choice for developers looking to implement web services on resource-constrained devices. Here’s a closer look at what Phew! offers:
/greet/<name>, enabling personalized responses based on URL parameters.{{name.lower()}}, making it simple to generate dynamic web content.connect_to_wifi convenience method, streamlining the process of connecting your device to the internet.Phew! is all about reducing the workload on developers. It aims to strip away the complexity and boilerplate code often associated with setting up a web server, opting instead for smart defaults and obscuring seldom-tweaked details.
First, you need to ensure that your Raspberry Pi Pico W has been flashed with the latest MicroPython firmware and is ready to be programmed, You can follow How To Get Started with Raspberry Pi Pico in 2024 step by step guide.

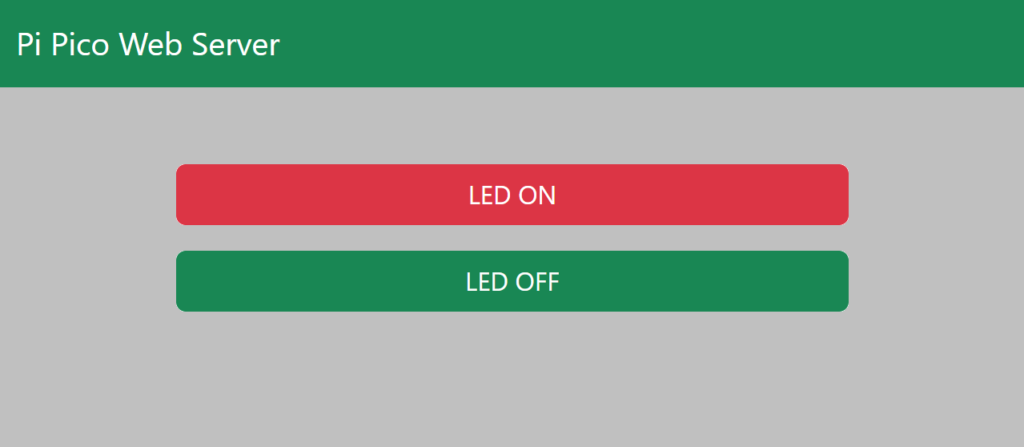
To create a functional and interactive webpage that your Raspberry Pi Pico W can serve, you’ll need to write some HTML code. This webpage will allow you to control the LED through your web browser by simply clicking links or buttons.
Below is a basic example of HTML content that you can start with. This example includes links to turn the LED on and off.
<!doctype html>
<html lang="en">
<head>
<title>Raspberry Pi Pico Web Server</title>
<!-- Required meta tags -->
<meta charset="utf-8" />
<meta
name="viewport"
content="width=device-width, initial-scale=1, shrink-to-fit=no"
/>
<!-- Bootstrap CSS v5.2.1 -->
<link
href="https://cdn.jsdelivr.net/npm/bootstrap@5.3.2/dist/css/bootstrap.min.css"
rel="stylesheet"
integrity="sha384-T3c6CoIi6uLrA9TneNEoa7RxnatzjcDSCmG1MXxSR1GAsXEV/Dwwykc2MPK8M2HN"
crossorigin="anonymous"
/>
</head>
<body>
<header>
<nav
class="navbar navbar-expand-sm navbar-dark bg-success"
>
<a class="navbar-brand" href="#"> Pi Pico Web Server</a>
</nav>
</header>
<main class="container">
<div class="d-grid gap-3 p-5">
<a
href="/on"
class="btn btn-danger"
>
LED ON
</a>
<a
href="/off"
class="btn btn-success"
>
LED OFF
</a>
</div>
</main>
<footer>
<!-- place footer here -->
</footer>
<!-- Bootstrap JavaScript Libraries -->
<script
src="https://cdn.jsdelivr.net/npm/@popperjs/core@2.11.8/dist/umd/popper.min.js"
integrity="sha384-I7E8VVD/ismYTF4hNIPjVp/Zjvgyol6VFvRkX/vR+Vc4jQkC+hVqc2pM8ODewa9r"
crossorigin="anonymous"
></script>
<script
src="https://cdn.jsdelivr.net/npm/bootstrap@5.3.2/dist/js/bootstrap.min.js"
integrity="sha384-BBtl+eGJRgqQAUMxJ7pMwbEyER4l1g+O15P+16Ep7Q9Q+zqX6gSbd85u4mG4QzX+"
crossorigin="anonymous"
></script>
</body>
</html>
index.html.index.html file to the same directory as your Python script. How you do this will depend on your setup and how you’re editing and running scripts on your Raspberry Pi Pico W.
Now, let’s get to the exciting part—creating your own Web Server on Raspberry Pi Pico W:
from phew import server, connect_to_wifi
import machine

ip = connect_to_wifi("SSID","PASSWORD")

print(ip)

page = open("index.html","r")
html= page.read()
page.close()

led = machine.Pin("LED", machine.Pin.OUT)

@server.route("/", methods=["GET"])
def home(request):
    return str(html)

@server.route("/<command>", methods=["GET"])
def command(request, command):
    if command == "on":
        led.on()
    elif command == "off":
        led.off()
    return str(html)

@server.catchall()
def catchall(request):
    return "Page not found", 404

server.run()
This code snippet demonstrates how to use the phew library to create a simple web server on a device like the Raspberry Pi Pico W, connect it to a Wi-Fi network, serve a static HTML page, and control an LED through web requests. Here’s a step-by-step explanation:
from phew import server, connect_to_wifi imports the necessary functions from the phew library for creating a web server and connecting to a Wi-Fi network.import machine imports the MicroPython machine module, which provides access to the hardware components of the microcontroller, such as GPIO pins.ip = connect_to_wifi("SSID", "PASSWORD") connects the microcontroller to a Wi-Fi network. It stores the IP address assigned to the device in the variable ip.print(ip) prints the device’s IP address to the console, which is helpful for knowing the address to access the web server.html, and then closes the file. This HTML content is served as the homepage of the web server.led = machine.Pin("LED", machine.Pin.OUT) initializes a GPIO pin as an output to control an LED. Note that "LED" should be replaced with the actual pin number or name according to your microcontroller’s documentation.@server.route("/", methods=["GET"]) defines a route for the web server’s root URL. When a GET request is received, the function home(request) is called, which returns the HTML content read earlier, displaying the homepage.@server.route("/<command>", methods=["GET"]) creates a dynamic route that captures part of the URL as a variable named command. This allows the user to control the LED by visiting URLs like /on or /off. Based on the command, the LED is turned on or off, respectively, and the homepage HTML is returned.@server.catchall() defines a catch-all route for any requests that don’t match the above routes. It returns a “Page not found” message with a 404 status code, indicating that the requested page could not be found.server.run() starts the web server, making it listen for incoming requests on the connected Wi-Fi network.Save this file as main.py and upload to Raspberry Pi Pico W and click on run.
Congratulations! You’ve just built your own web server using a Raspberry Pi Pico W and Phew. This setup is a fantastic starting point for more complex projects, like home automation systems, personal websites, or IoT applications. The possibilities are endless, limited only by your imagination and willingness to experiment.
Happy coding, and enjoy your journey into the world of web servers and microcontrollers!
Raspberry Pi Pico W is a microcontroller board that features wireless connectivity, making it ideal for IoT projects and applications that require internet access or network connections.
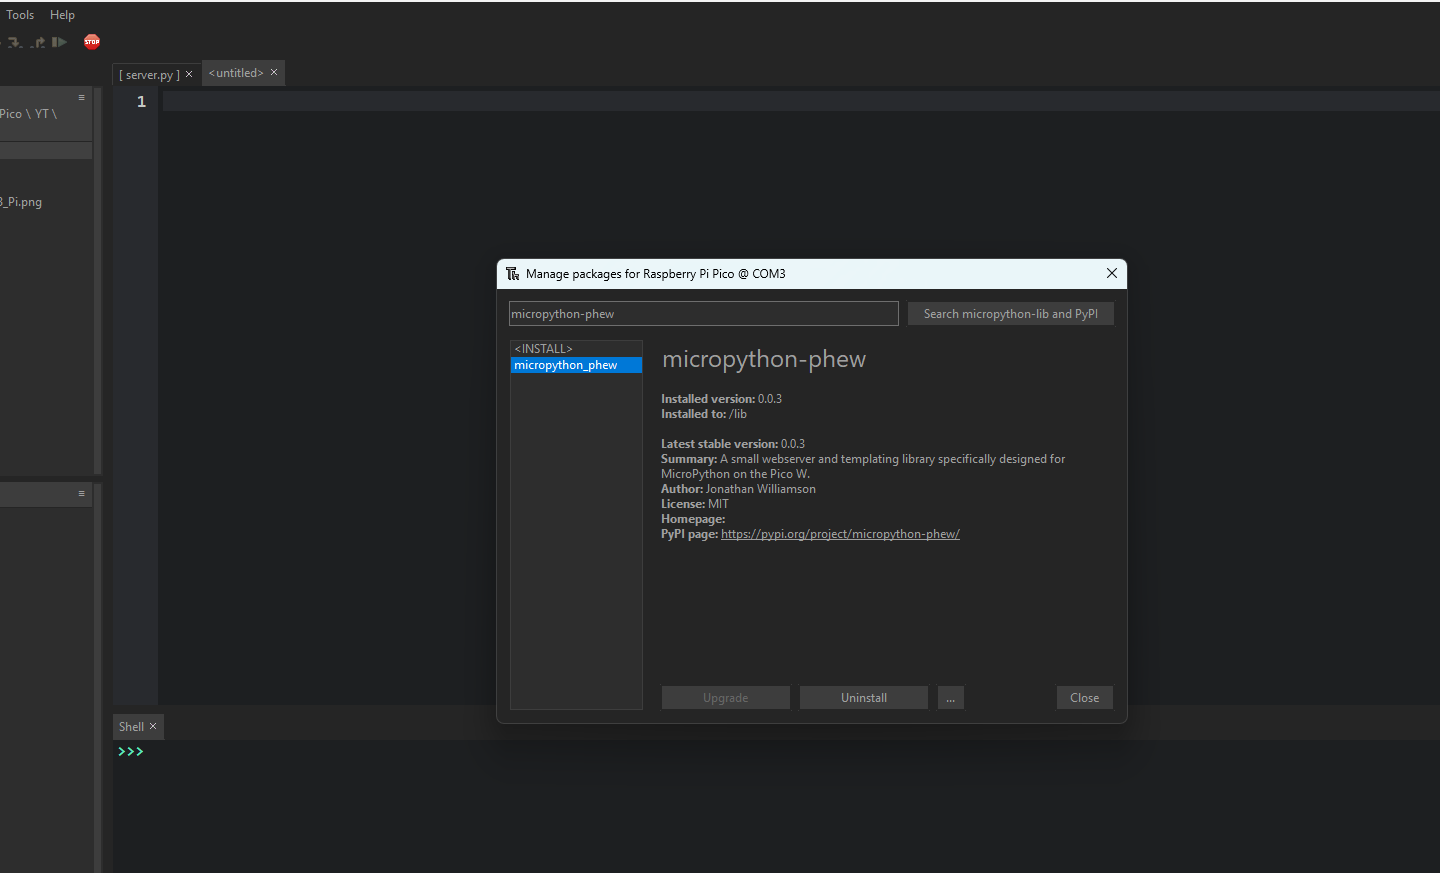
Phew is a small webserver and templating library specifically designed for MicroPython on the Pico W. It aims to provide a complete toolkit for easily creating high quality web based interfaces for your projects.
A web server on a Raspberry Pi Pico W can be used for a variety of projects, such as home automation, remote sensor monitoring, and controlling devices over the internet.
Yes, you can host simple websites or web pages. However, due to memory and processing limitations, it’s best suited for basic interfaces, control panels, or serving sensor data.
This guide specifically focuses on the Raspberry Pi Pico W due to its built-in Wi-Fi capabilities. While Phew can work with other microcontrollers, additional steps or hardware might be required to establish a network connection.
Having some basic understanding of Python programming will help you follow the guide more easily. However, the step-by-step instructions are designed to be accessible even for beginners.